Vending machine maintenance should cover five areas: cleaning, dispensing hardware, payment systems, refrigeration where fitted, and electrical or network diagnostics. Basic checks belong in every refill visit, while deeper mechanical inspections should follow a planned schedule based on machine usage, operating conditions, and the manufacturer’s service instructions.
Many service calls do not begin with a failed component. A package can shift inside a lane, a vend sensor can become dirty, condenser airflow can become restricted, a payment terminal can lose communication, or a connector can work loose after repeated door movement. Finding those problems early is the point of preventive maintenance. The schedule below gives operators a practical starting point for routine inspection, vending machine repair decisions, troubleshooting, spare-parts planning, and long-term equipment care.

Vending Machine Maintenance Schedule at a Glance
A maintenance calendar is useful only when it reflects the equipment in front of you. A lightly used machine and a machine processing hundreds of transactions between service visits should not automatically receive identical treatment. Refrigeration, dust, product type, door-opening frequency, dispensing mechanism, payment hardware, and machine age all affect the amount of attention required.
The intervals below are planning baselines rather than fixed service rules. Where a machine manual specifies a different interval, follow the machine documentation. Shorten the interval whenever inspection history shows that a component is becoming dirty, loose, misaligned, or unreliable before the scheduled service date.
| When | What to Check | Typical Responsibility | Stop Normal Operation If |
|---|---|---|---|
| Remote review | Machine online status, payment communication, temperature alerts, failed vends, controller alarms, inventory alerts, and unusual door events where monitoring is available | Operations or route team | A serious temperature, payment-security, repeated electrical, or machine-control fault appears |
| Every refill visit | Exterior condition, product loading, pickup area, display, payment device, test vend, active faults, visible power-cord condition, and general cleanliness | Route staff | There is damaged wiring, unusual heat, burning odor, water near electrical parts, suspected payment tampering, or major structural damage |
| Weekly or during frequent service | High-use selections, delivery area, product debris, seals, reader mounting, repeat failed-vend history, and refrigerated temperature records where applicable | Route or trained service staff | The same problem is appearing repeatedly or refrigeration is not maintaining the required product conditions |
| Monthly | Dispensing hardware, vend sensors, accessible fans and vents, condenser airflow area, hinges, locks, visible connectors, network hardware, door seals, and interior cabinet cleanliness | Trained service staff | A mechanical system cannot operate repeatedly without adjustment or electrical damage is visible |
| Quarterly | Deeper cabinet cleaning, payment-device comparison against reference photos, error history, fastening hardware, wiring movement points, software requirements, and wear components | Technician | Fault history shows deterioration that is likely to interrupt normal sales |
| Every 6 months | Fans, gaskets, motors, belts, elevator mechanisms if installed, validator condition, frequently flexed wiring, refrigeration performance, and high-cycle mechanical parts | Technician | Parts require repeated readjustment or performance has become inconsistent |
| Annually | Full documented inspection based on the service manual, including mechanical, electrical, payment, refrigeration, cabinet, software, and safety-related items applicable to the machine | Qualified service personnel | Structural damage, recurring electrical problems, refrigeration faults, obsolete critical parts, or repair economics justify major refurbishment or replacement |
| As required | Sealed refrigeration work, advanced electrical repair, payment-security incidents, controller-board repair, or work requiring specialized authorization | Qualified or authorized specialist | The work exceeds the training, documentation, equipment, or authorization available to routine service staff |
Calendar intervals should also be compared with transaction history. A machine that completes a high number of vend cycles can accumulate mechanical wear much faster than another unit of the same age. Where transaction data is available, service planning becomes more useful when machine age and actual usage are considered together.
Checks to Make at Every Service Visit
A refill visit is already paid travel time. Using a few extra minutes for a structured inspection can prevent a second trip for a fault that was visible during stocking.
Look at the machine before opening the door
Start with the cabinet. Check whether the machine is sitting squarely, whether the door closes evenly, and whether the glass, trim, hinges, lock, payment reader, pickup door, ventilation openings, or external cables show fresh damage.
Look at the power cord and plug where they are visible. A cord trapped under a caster, stretched across a sharp cabinet edge, damaged near the plug, or showing exposed conductors should not be treated as a cosmetic issue. Signs of overheating, discoloration, arcing, or a burning smell require proper electrical investigation.
Check the customer path, not only the service menu
A machine can pass an internal motor test and still fail during an ordinary purchase. The useful test is the full sequence: selection, price display, payment authorization, product release, delivery confirmation, customer pickup, and transaction recording.
A representative test vend is particularly important after product changes, mechanical adjustment, payment work, controller updates, or a previous failed-vend complaint. The test should confirm that the machine behaves correctly from the customer side, not simply that a motor turns when commanded manually.
Treat product loading as part of maintenance
A surprising number of apparent machine faults are product-fit problems. A bag can become wider after a packaging revision. A carton can be loaded backward. Several flexible packages can press against one another and increase friction. A bottle with a different shoulder shape can sit differently inside a lane even when its maximum width has barely changed.
Check that products sit naturally inside the channel, move without binding, and have enough clearance from neighboring lanes. Do not increase capacity by compressing packages so tightly that the dispensing mechanism has to overcome unnecessary resistance.
At Zhongda Smart, actual product dimensions and dispensing behavior are treated as part of machine configuration rather than as an afterthought. The company’s published vending machine manufacturing process describes product width, height, depth, weight, rigidity, fragility, temperature, and packaging shape as factors that can affect cargo-lane design and delivery-system selection.
Check what changed since the previous visit
Maintenance gets easier when the technician knows what is different. Ask whether the product mix changed, whether a new payment device was installed, whether software was updated, whether the machine was moved, or whether an intermittent problem has become more frequent.
A fault that appeared immediately after a change deserves a different diagnostic approach from a fault that developed gradually over six months.
Cleaning and Sanitation
Cleaning is one of the simplest forms of preventive maintenance, but it affects more than appearance. Dust can reduce airflow. Sticky residue can interfere with pickup doors and moving parts. Debris can block optical sensing areas. Dirt inside payment equipment can affect media transport. Product crumbs can collect below spirals, belts, or shelves.
Customer-contact surfaces
Clean the screen, selection controls, pickup door, handles, payment-reader surround, and frequently touched cabinet surfaces with products that are compatible with the materials being cleaned. Avoid spraying liquid directly into screens, card-reader openings, cabinet seams, ventilation slots, keypads, or electrical assemblies.
Apply cleaner to the cloth when possible. Strong solvents can damage plastics, display coatings, decals, printed graphics, rubber seals, and painted finishes even when they remove dirt quickly.
Interior cabinet
Remove loose packaging, crumbs, labels, dust, sticky residue, and foreign objects from product shelves and the cabinet floor. Pay special attention to the pickup area and the path between the product lane and delivery bin. Something as small as a torn wrapper can interfere with a sensor or moving pickup flap.
Electronic assemblies should remain dry unless a specific component service procedure says otherwise. Do not soak motors, controller boards, connectors, display electronics, sensors, payment devices, or wiring.
Product lanes
Clean surfaces that guide or support products. Residue changes friction, and changed friction changes dispensing behavior. This matters with belts, sliding pushers, guides, elevator transfer points, and packages with glossy surfaces.
When repeated jams occur in one selection, inspect the lane before assuming that the motor has become weak. Dirt, packaging residue, an incorrectly positioned divider, or a product leaning against another channel can create the same symptom.
Refrigeration airflow area
Dust around a condenser or ventilation opening deserves special attention. Refrigerated equipment has to move heat from inside the cabinet to the surrounding air. When an airflow path becomes restricted, the refrigeration system has to work under poorer conditions.
Use the cleaning method specified for the refrigeration equipment. Protect fins from damage and prevent loose dirt from being pushed deeper into components. Disconnect and secure power where required by the service procedure.
Cleaning frequency should follow actual conditions
There is no honest universal statement that every vending machine condenser must be cleaned on exactly the same number of days. Inspection frequency should reflect how quickly dust accumulates, how the cabinet is ventilated, how often the door is opened, and what the equipment documentation requires.
A monthly inspection can be a useful baseline. If the condenser remains clean for months, service can be planned accordingly. If visible buildup develops much sooner, waiting for an arbitrary calendar date makes little sense.
Motors, Spirals, Belts, Elevators, and Vend Sensors
The dispensing system is where most physical vending errors become visible to the customer. Diagnosis is easier when the system is divided into separate steps instead of treating every failed delivery as a “motor problem.”

Before replacing a part, answer five questions
-
What exactly did the customer experience? Did the product remain in the lane, hang partly out, fall but fail detection, or reach the pickup area?
-
What did the controller record? Check the relevant fault, vend result, refund event, or peripheral status where logs are available.
-
Did the controller issue the command? A motor cannot respond to a command it never received.
-
Did the mechanism physically move? Watch and listen rather than relying only on the display message.
-
Was successful delivery actually confirmed? A motor completing its rotation does not prove that the product reached the customer.
This sequence prevents unnecessary part replacement. A product that fails to drop can be caused by the package, lane setup, spiral position, motor, wiring, controller output, transfer mechanism, or vend sensor. Replacing the motor first may fix nothing.
Spiral and coil lanes
Check whether the spiral is fully seated, whether it rotates without scraping, and whether the product is positioned correctly between turns. The end position matters because it determines how far the first product sits toward the front of the shelf.
Inspect dividers and neighboring coils. Two independently operating lanes can interfere with each other if a package bulges sideways or a divider has shifted.
When changing products, confirm package width, depth, height, weight, and stiffness. A coil that works with a rigid box may not control a flexible pouch in the same way.
Belt and conveyor systems
Inspect belts for tracking, contamination, wear, and loss of tension. Check transfer points where a product moves from the storage lane to another mechanism. A belt can still run while slipping under load, which is why unloaded tests do not always reproduce the failure.
Clean product-contact surfaces according to the equipment procedure. Sticky residue or dust can alter grip enough to create intermittent vending problems.
Elevator or lift delivery
Elevator systems introduce additional movement, position sensing, and transfer steps. Inspect the travel path for obstructions and listen for scraping, repeated homing, delayed positioning, or changes in motor sound.
Check the points where the product leaves the shelf, enters the lift, and moves from the lift into the pickup area. A fault at one transfer point can look like an elevator-drive problem even when the lift itself is functioning.
Zhongda Smart’s current refrigerated combo vending platform illustrates why the dispensing configuration matters. The machine can be configured around different product sizes and uses controlled delivery options where appropriate. For maintenance planning, the important point is that the selected delivery system should match the merchandise the machine will actually carry.
Vend sensors
Optical sensing areas should remain clean and correctly positioned. A dirty or blocked sensor can report an unsuccessful vend even after the item falls. A loose connector can make the problem intermittent.
When the machine reports failed delivery but the mechanism appears normal, test the sensor path before replacing a motor or controller board. Where the software records individual lane events, compare the reported failure with what actually happened during a test vend.
Cashless Readers, Bill Validators, and Coin Systems
A vending machine is not fully available if customers cannot complete payment. Payment hardware therefore belongs on the preventive maintenance checklist even when the rest of the machine is operating normally.
Inspect cashless terminals for physical changes
Keep a reference image of the approved terminal installation. During service, compare the device position, housing, reader face, mounting, seals, cables, labels, and surrounding panel with that reference.
The PCI Security Standards Council recommends maintaining an up-to-date list of deployed point-of-interaction devices and periodically inspecting those devices for tampering or unauthorized substitution. Unattended payment equipment deserves particular attention because customers can physically access the terminal while staff are absent.
If a payment device looks different from the approved installation, do not continue normal use just because transactions appear to work. Follow the payment provider’s incident and security procedure.
A card-reader error is not always a card-reader failure
Before replacing a terminal, separate the possible causes:
-
Is the machine itself online?
-
Does the terminal have power?
-
Is communication with the vending controller working?
-
Are cables fully seated and undamaged?
-
Is there a machine-side communication error?
-
Is the payment service experiencing a separate outage?
-
Did the fault start after a software, modem, SIM, antenna, or payment configuration change?
This diagnostic order matters. Replacing a working terminal will not repair weak connectivity or an interrupted controller interface.
MDB compatibility
Many vending controllers and peripherals use the Multi-Drop Bus/Internal Communication Protocol. NAMA currently makes MDB/ICP Version 4.3 available in its vending technology resources.When replacing a cashless reader, bill validator, coin mechanism, or controller, interface compatibility should be confirmed rather than assumed from connector appearance.
Zhongda Smart’s cashless vending configuration combines digital payment options with remote management and transaction monitoring. For maintenance purposes, that type of connected architecture is useful because payment faults can be reviewed together with machine and network status instead of being diagnosed in isolation.
Bill validators
Inspect for foreign objects, folded notes, accumulated debris, damaged guides, and incorrect installation of removable components. Clean only according to the validator manufacturer’s method. Optical surfaces and transport mechanisms can be damaged by aggressive chemicals, abrasive tools, or unapproved lubricants.
Repeated rejection of otherwise valid notes should be documented. Record whether the problem affects one denomination, multiple denominations, or all cash acceptance. That distinction helps separate configuration problems from contamination and hardware failure.
Coin mechanisms
Check coin paths, tubes, cassettes, connectors, and obvious jams. Confirm that removable assemblies are seated correctly after cash collection. If the machine suddenly stops returning change after a service visit, incorrect reinstallation should be considered before assuming electronic failure.
Refrigerated Vending Machine Maintenance
Refrigerated vending equipment has to function as both a retail machine and a thermal system. Maintenance should therefore cover airflow, sealing, fans, temperature measurement, product loading, sensors, controls, and the condition of the refrigeration equipment.
Begin with airflow
When a refrigerated machine is not cooling as expected, check the simplest physical conditions before assuming refrigerant loss or compressor failure.
-
Is the ventilation path open?
-
Is visible condenser buildup restricting airflow?
-
Are accessible fans operating normally?
-
Has the machine been moved into a position that blocks required ventilation?
-
Is the door closing fully?
-
Is the gasket sealing around the complete perimeter?
-
Was the cabinet recently restocked with a large load of warmer product?
These checks can explain weak cooling without opening the sealed refrigeration circuit.
Inspect door seals closely
A gasket can look intact from several feet away while failing at one corner. Check for tears, flattening, dirt, deformation, gaps, or a door that no longer sits squarely against the cabinet.
Clean gasket surfaces with an approved method. If a seal repeatedly pulls away or no longer contacts the mating surface evenly, determine whether the problem is the gasket, door alignment, hinge condition, or cabinet position.
Verify the temperature that matters
A controller display tells you what its sensor sees. It does not automatically tell you the temperature of every product in every part of the cabinet. Where product control requires verification, use the operator’s approved measurement procedure and compare the machine reading with an independent measurement.
Product requirements should determine the target condition. A numeric setting should not be copied from another machine merely because both cabinets use refrigeration.
For reference, Zhongda Smart lists an adjustable 2°C–25°C operating range for the ZD-L-22 refrigerated vending configuration, along with approximately 300–360 pieces of capacity and about 60 standard cargo lanes. Those are specifications for that machine configuration, not storage recommendations for every product.
Look for a change in recovery behavior
Trend changes often appear before a complete refrigeration failure. Compare present behavior with the machine’s normal pattern:
-
Does the cabinet take longer to recover after restocking?
-
Does the compressor appear to run substantially longer than before?
-
Has fan noise changed?
-
Is condensation appearing in a new location?
-
Does the temperature fluctuate more than it previously did under similar operation?
A single observation may not identify the fault, but a documented change gives the technician something concrete to investigate.
Energy performance and maintenance are connected
ENERGY STAR states that certified refrigerated beverage vending machines are, on average, 9% more energy efficient than standard models and save about 1,000 kWh annually.Its guidance also identifies efficient compressors, fan motors, lighting, and low-power operating modes as important design features.
Those figures describe qualified equipment performance rather than a guaranteed saving for every installation. A damaged seal, restricted heat-rejection airflow, incorrect settings, or a failing fan can still push a refrigerated machine away from its intended operating condition.
Know where routine maintenance ends
Cleaning an accessible airflow area and checking a door gasket are very different from opening a sealed refrigeration circuit. ISO 5149-4:2022 addresses safety and environmental requirements for operation, maintenance, repair, refrigerant recovery, reuse, and disposal.
Sealed-system diagnosis and refrigerant work should be performed by personnel with the appropriate qualification, equipment, and applicable authorization.
Electrical, Connectivity, and Software Checks
Modern vending equipment combines mechanical parts with power supplies, controller boards, displays, payment peripherals, sensors, modems, antennas, and software. A fault reported by one subsystem can originate somewhere else.
Electrical warning signs
Do not normalize repeated breaker trips, intermittent loss of power, a hot plug, damaged insulation, electrical odor, arcing, visible heat discoloration, or unexplained resets.
Record the exact symptom before changing components. Useful information includes the error code, time of failure, whether refrigeration was running, whether payment equipment restarted, and whether the fault occurred during dispensing or while the machine was idle.
A fuse is not a diagnosis
If a protective device opens repeatedly, replacing it without finding the cause creates a cycle rather than a repair. Use only the specified replacement type and investigate the circuit that caused the protection to operate.
Electrical testing beyond routine visual inspection should be performed by personnel trained for the work. Safety interlocks and protective devices should never be bypassed simply to make service faster.
Inspect moving wiring points
Door-mounted screens, payment devices, lights, readers, and controls require cables to move whenever the main door is opened. Over time, repeated flexing can stress wiring and connectors.
Look for pinching, rubbing, excessive tension, loose connectors, damaged sleeving, or a harness that has moved from its intended route. Intermittent door-related faults deserve close attention at those flex points.
Network troubleshooting
When a connected machine goes offline, separate the vending functions from communication functions. Determine whether the machine still vends locally, whether only remote telemetry has stopped, and whether cashless payment is also affected.
Then check:
-
Modem or router power
-
SIM or network status where applicable
-
Antenna position and cable condition
-
Controller-to-communication-device connection
-
Recent configuration changes
-
Repeated reboot history
One isolated disconnect may not justify a service trip. Repeated disconnects from the same machine should be treated as a trend.
Remote monitoring should reduce unnecessary visits
Useful telemetry can show machine status, inventory, transaction history, temperature information where supported, cashless-device communication, door events, and fault codes. The maintenance benefit is not the number of alerts generated. It is the ability to decide whether a field visit is necessary and what parts or tools should go with the technician.
If I were choosing a remote-management platform for maintenance work, I’d prioritize clear fault history and machine state over decorative dashboards. A technician needs to know what stopped working, when it happened, whether it repeated, and what else changed at the same time.
Software and firmware changes
Document versions before updating software. Confirm compatibility with the vending controller, payment hardware, communication devices, and installed options. Where possible, avoid changing several unrelated systems at once because doing so makes the source of a new problem much harder to isolate.
An update should have a defined purpose such as correcting a known fault, improving security, enabling required compatibility, or adding a necessary function. A working vending machine should not become an uncontrolled test environment simply because a newer software version exists.
Vending Machine Troubleshooting: Start With the Symptom
Good troubleshooting narrows the fault before a replacement part is ordered. The table below separates product, mechanical, payment, electrical, network, and refrigeration symptoms so that the first check matches the failure that actually occurred.
| Symptom | Likely Category | First Check | Next Check | Escalate When |
|---|---|---|---|---|
| One selection jams repeatedly | Product / mechanical | Product size, loading orientation, lane width, divider position, and obstruction | Spiral, belt, motor movement, connector, and vend sensor | The lane remains unreliable with correct product loading and setup |
| Several selections stop together | Electrical / control | Shared harness, controller error, common power path | Board communication and configuration | Electrical or controller diagnosis requires technical testing |
| Motor turns but product stays in lane | Product / mechanical | Package fit and spiral or belt position | Lane geometry and mechanism movement under load | Correct lane setup still produces repeated failures |
| Product falls but machine reports a failed vend | Sensor / control | Vend-sensor cleanliness and obstruction | Sensor alignment, connector, event log | Sensor or controller fault remains after inspection |
| Card terminal offline | Payment / network | Terminal power, network status, physical cabling | Controller communication, MDB status, provider status | Device remains offline or tampering is suspected |
| Notes rejected frequently | Payment / mechanical | Validator path, debris, jams, denomination settings | Approved validator cleaning and diagnostics | Component fails its documented test procedure |
| Machine does not cool normally | Refrigeration / airflow | Door closure, gasket, airflow, condenser area, fans | Temperature sensing, controller settings, recovery trend | Sealed refrigeration work or electrical diagnosis is required |
| New condensation appears | Refrigeration / sealing | Door seal, door-open condition, drain area, loading | Cooling behavior and cabinet condition | Moisture approaches electrical components or the cause remains unresolved |
| Touchscreen freezes repeatedly | Software / power / control | Document error and recent software changes | Power stability, controller communication, storage or system logs | The fault returns after an approved restart or affects payment operation |
| Machine resets at random | Electrical / control | Power source, plug, visible wiring, fault history | Power supply, controller, peripheral loads | Electrical damage is visible or resets continue without a clear cause |
| Elevator stops before pickup | Mechanical / sensor | Obstruction, transfer path, product dimensions | Drive system, position sensor, controller errors | Normal positioning cannot be restored reliably |
| Remote inventory does not match physical stock | Software / configuration | Refill records, lane mapping, refunds, failed-vend events | Synchronization and product configuration | The mismatch persists after a complete physical count |
Do not close the service ticket until the repair is proven
The last step is a repeatable functional test. If the technician adjusted a product lane, run representative products through that lane. If a card terminal was reconnected, make a transaction using the supported payment flow. If an elevator was adjusted, confirm repeated positioning and delivery.
“Machine powered on” is not proof that the original complaint has been resolved.
Write service notes that someone else can use
A useful record describes the symptom, evidence, action, and result:
Weak note: “Fixed selection 16.”
Useful note: “Selection 16 intermittently held the second package. Package width had increased after stock change. Divider position corrected, lane reloaded without compression, and repeated test vends completed successfully.”
The second note can help the next technician immediately. It can also reveal recurring product-fit problems across several machines.
Why Factory Testing Affects Future Maintenance
Long-term serviceability is partly determined before the machine leaves production. Cabinet access, cable routing, lane configuration, airflow, payment integration, sensor placement, and the quality of final testing all affect how easily a future fault can be diagnosed.
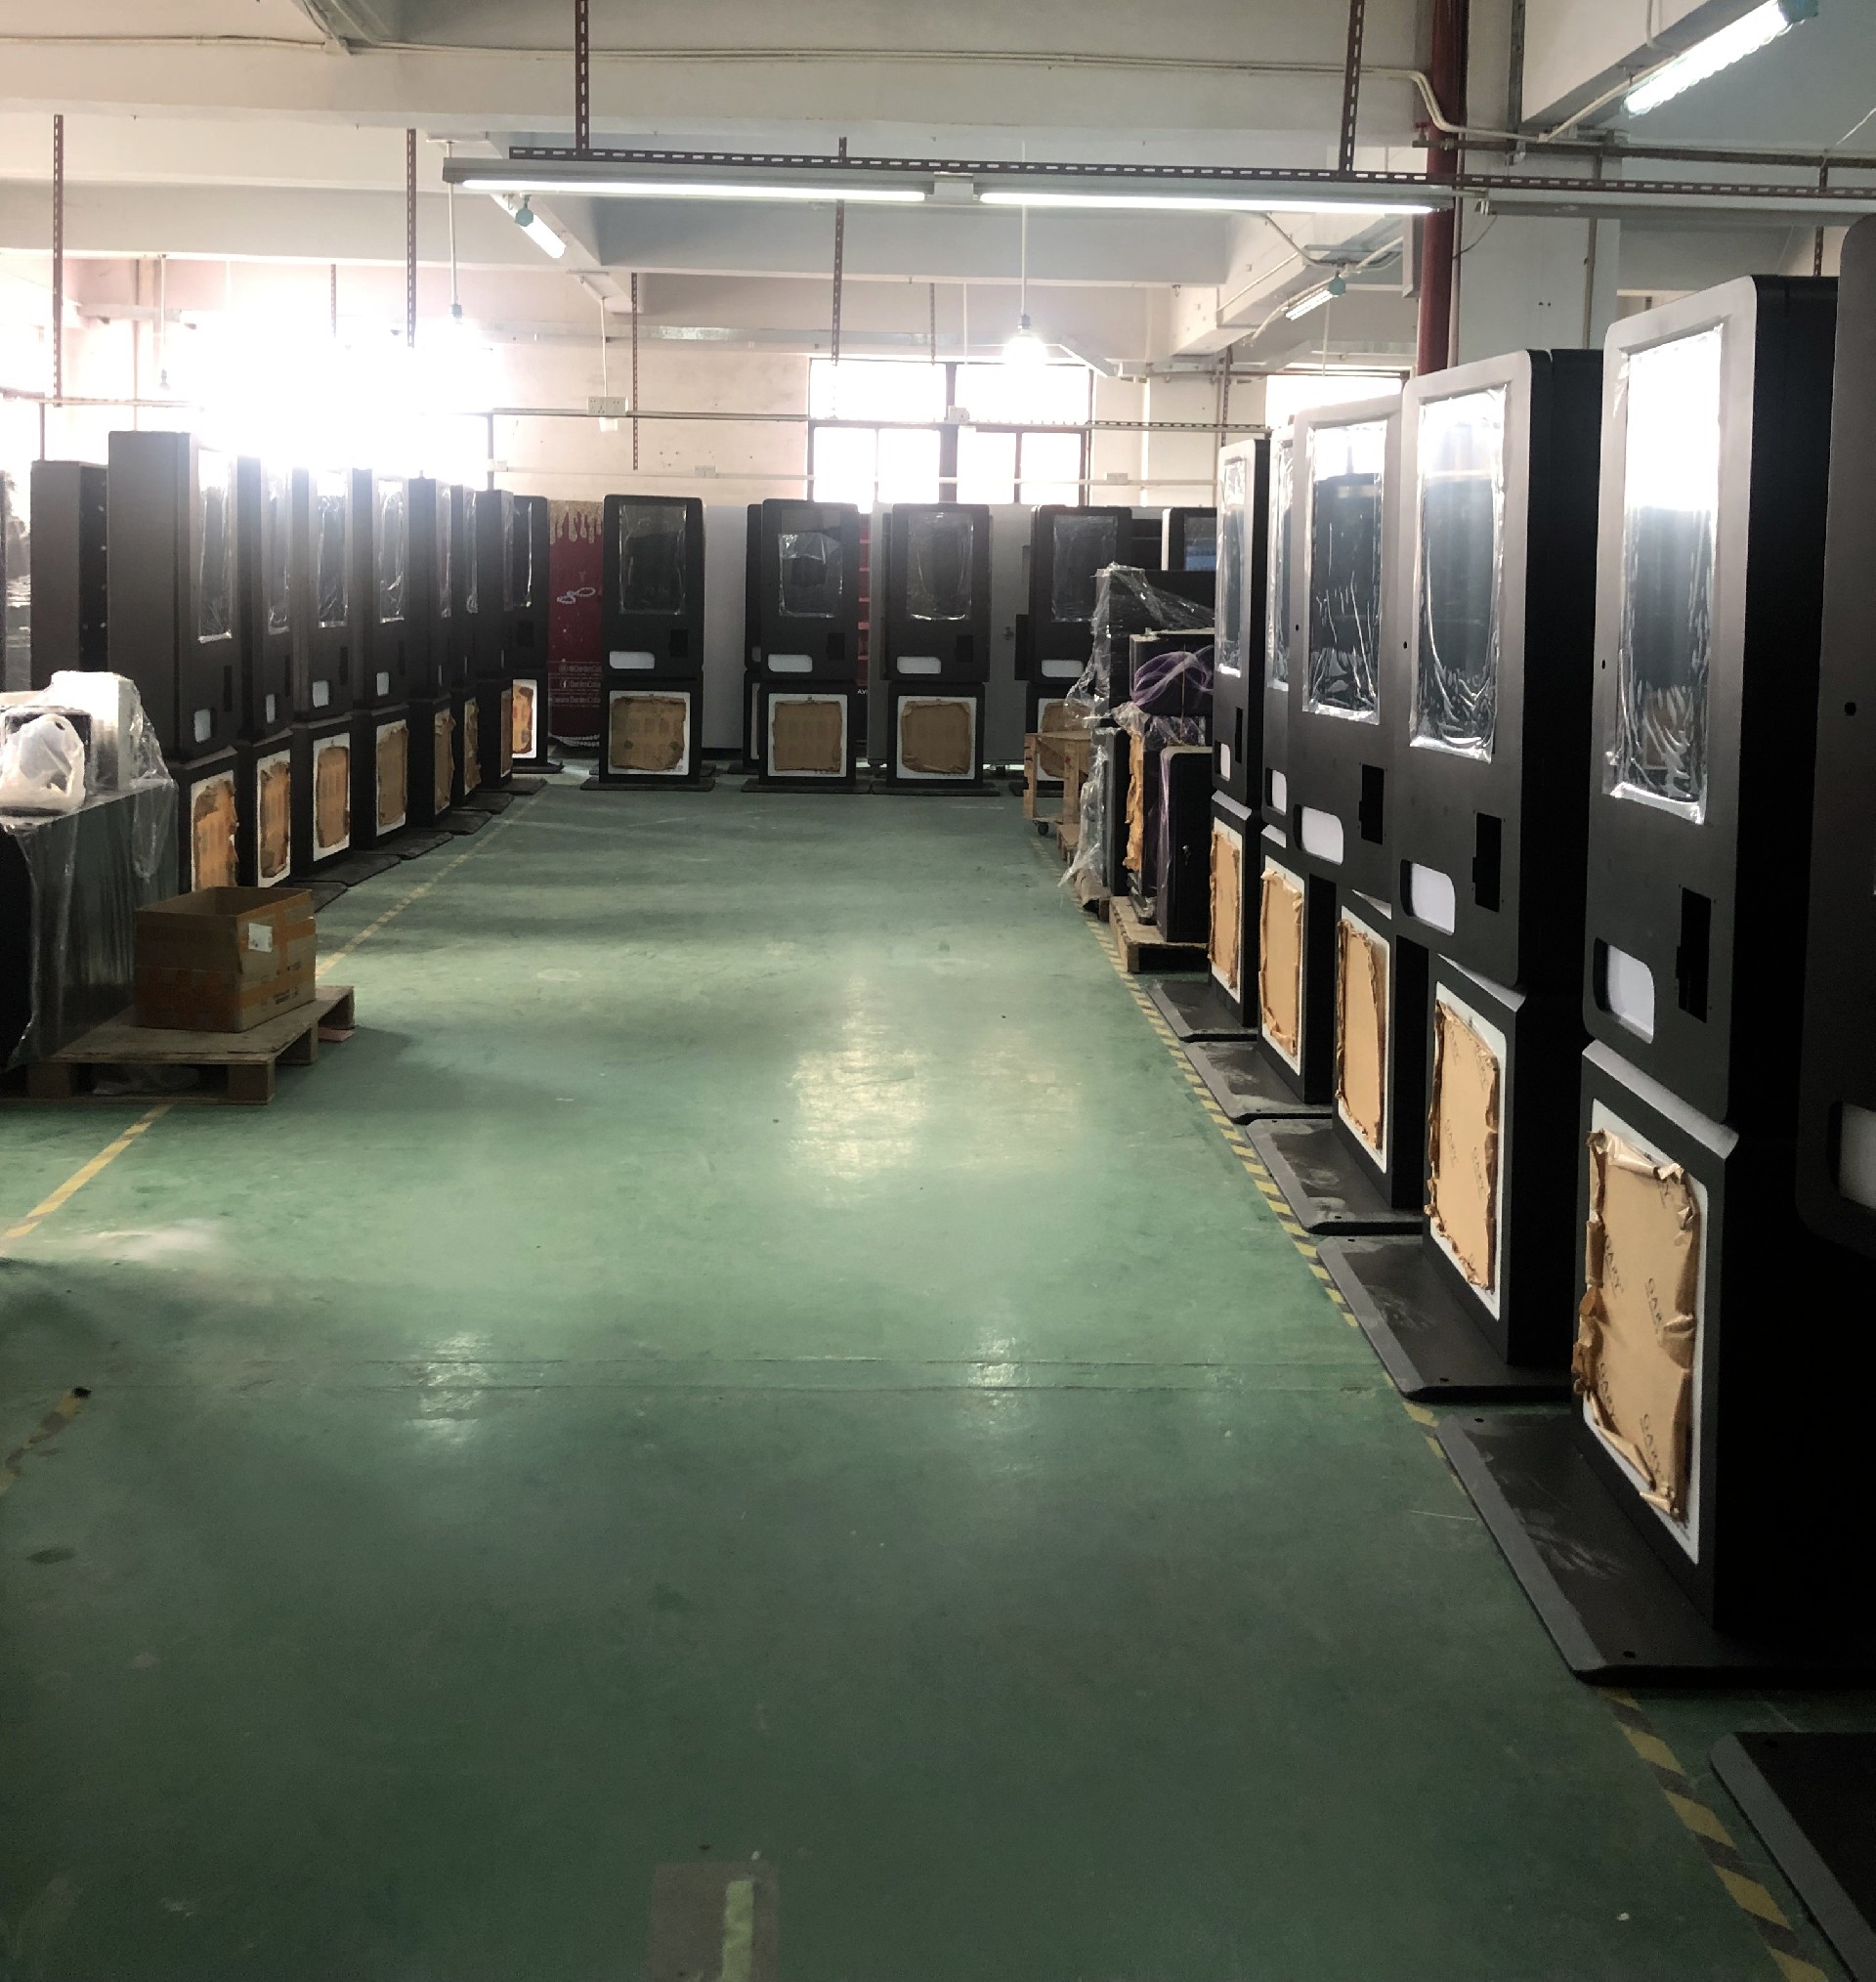
Zhongda Smart’s published manufacturing workflow covers specification confirmation, mechanical engineering, sheet-metal production, assembly, software and payment integration, sample testing, quality control, aging tests, final acceptance, and shipment preparation. Current public factory information lists approximately 20,000 square meters of working space, more than 400 employees, an engineering team of more than 10 people, three assembly lines, more than 20 quality inspectors, and annual production capacity of 10,000 units.
Those figures matter less to maintenance than what happens inside that process. A machine becomes easier to support when common service areas remain accessible, wiring is routed consistently, the payment configuration is known, replacement parts are identifiable, and the actual merchandise has been considered during dispensing setup.
Real-product testing catches problems that dimensions can miss
Measurements are necessary, but two packages with similar dimensions can behave differently. Surface finish, flexibility, center of gravity, stiffness, and packaging shape can change how an item travels through a spiral, belt, lift, or pickup area.
If I were choosing a configuration for an unusual product, I’d send representative merchandise for physical dispensing evaluation before production. A package that passes a real vend test provides more useful information than a dimensional drawing alone.
Refrigeration serviceability also starts at design
A refrigerated cabinet needs space for airflow, heat rejection, thermal components, sealing, drainage or condensation control where applicable, sensors, and service access. A layout that makes routine inspection unnecessarily difficult will continue costing time throughout the machine’s life.
That is why maintenance should be discussed during equipment specification, not only after delivery.
Consistent assembly makes later diagnosis easier
A technician supporting a fleet benefits when wiring routes, mounting points, connectors, lane layouts, and controller locations are repeatable from one unit to another. Standardization reduces the number of surprises inside the cabinet and makes spare-parts planning more accurate.
Tools and Spare Parts Worth Keeping
A good service kit is specific to the installed fleet. Carrying a large number of unknown or visually similar components is less useful than having a smaller set of verified parts with clear model compatibility.
Basic maintenance tools
-
Inspection light
-
Microfiber cleaning cloths
-
Approved surface-cleaning materials
-
Soft brushes and suitable dust-removal equipment
-
Correct screwdrivers, drivers, and standard hand tools
-
Independent temperature-measurement equipment where required
-
Machine documentation and wiring information
-
Reference photographs of approved payment-device installations
-
Service laptop or approved diagnostic device where the platform requires one
-
Electrical test equipment only for personnel qualified to use it
What spare parts deserve shelf space?
| Part | Why It May Be Worth Stocking | Confirm Before Ordering |
|---|---|---|
| Dispensing motor or drive module | Can restore a failed selection quickly | Voltage, connector, controller compatibility, mounting, drive type |
| Spirals, dividers, belts, pushers, or lane hardware | Individual channels can be damaged or reconfigured | Lane dimensions, product setup, mechanism type |
| Vend sensors | Sensor faults can create false failed-vend events | Sensor design, connector, mounting, controller compatibility |
| Fans | Airflow is critical to cabinet cooling and electronics | Voltage, dimensions, airflow direction, connector, mounting |
| Door gasket | A poor seal can affect refrigerated performance | Exact door and cabinet configuration |
| Locks and approved lock hardware | Lock damage can take a working machine out of service | Key management, lock type, mounting |
| Approved communication cables and harnesses | Intermittent connections can disable payment or peripherals | Pinout, specification, connector, cable length |
| Specified fuses or protective components | Useful after the original electrical fault has been properly diagnosed | Exact type, rating, and equipment specification |
I’d choose parts traceability over spare-parts quantity. Each stocked component should have a part number, compatible machine models, supplier reference, and known storage location.
Do not create a drawer of mystery parts
Unlabeled motors, similar-looking cables, unidentified sensors, old payment readers, and boards removed from failed machines create risk. A technician under time pressure may install the wrong part simply because it fits physically.
Tag removed parts immediately as good, failed, untested, or repairable. Do not allow failed parts to migrate back into usable stock.
Maintenance Cost, Downtime, and Replacement Decisions
Maintenance protects the machine’s ability to sell. The financial question is not whether maintenance costs money; it is whether planned maintenance reduces the larger cost of avoidable failures, repeated travel, long outages, product loss, and emergency parts shipping.
Measure service cost per machine
A useful fleet calculation is:
Monthly maintenance cost per active machine = total annual maintenance cost ÷ active machine count ÷ 12
Include the costs that actually belong to maintenance:
-
Planned maintenance labor
-
Technical repair labor
-
Travel
-
Cleaning supplies
-
Replacement components
-
Spare-parts inventory
-
Payment-device service
-
Connectivity hardware
-
Refrigeration service
-
Software or remote-management costs assigned to equipment support
-
Emergency shipping
Measure service events against usage
Raw repair counts can be misleading because a high-volume machine naturally completes more cycles than a lightly used one.
Service events per 1,000 transactions = service events ÷ completed transactions × 1,000
This does not tell you whether every service event was preventable, but it provides a better comparison between machines with very different sales volume.
Track failed-vend rate
Where the system records reliable vend results:
Failed-vend rate = failed or refunded vend events ÷ total vend attempts × 100
Calculate the rate by machine and, where possible, by individual selection. A fleet average can hide one lane that fails repeatedly.
Measure restoration time
Mean time to restore = total recorded outage duration ÷ number of resolved outages
For better diagnosis, split the outage into waiting time and repair time. A machine may be easy to fix but remain offline for several days because the correct part was not available.
Estimate the revenue exposed during downtime
Use the machine’s own financial records rather than a generic industry claim:
Average gross margin per operating hour = monthly gross margin ÷ normal operating hours
Gross margin exposed during downtime = average gross margin per operating hour × outage hours
This is an internal planning estimate rather than guaranteed lost profit. Some purchases may shift to another time or channel. It is still useful when deciding how much service urgency a particular machine justifies.
Recognize repeat failure
A repair ticket that closes today and returns with the same symptom next week should not be treated as unrelated work. Repeat faults can point to incomplete diagnosis, product incompatibility, incorrect replacement parts, environmental conditions, wiring movement, configuration errors, or a deeper system problem.
The repeat-failure rate often tells more about maintenance quality than the number of tickets a team closes.
When repair stops making economic sense
Age alone is a poor replacement rule. Some older machines remain economical because their parts are standardized, the cabinet is sound, and the fault history is stable. A newer machine can become expensive if several subsystems are unreliable or the configuration is poorly matched to the products.
Consider major refurbishment or replacement when:
-
several unrelated systems are failing repeatedly;
-
critical replacement parts are no longer reasonably available;
-
cabinet corrosion or damage affects structure, security, or sealing;
-
refrigeration reliability cannot be restored economically;
-
payment or connectivity upgrades require extensive redesign;
-
repeat downtime is costing more than the asset can justify;
-
the machine no longer fits the merchandise or required transaction flow.
A practical comparison is:
12-month keep-and-repair cost = expected repairs + planned maintenance + required upgrades + estimated downtime exposure
Compare it with:
Replacement transition cost = replacement equipment + configuration + installation + payment setup + logistics − recoverable value of the current machine
Neither number should be evaluated in isolation. Reliability, parts support, service time, and the expected useful life of the new configuration matter as well.
How Machine Design Affects Maintenance
Maintenance cost starts with machine design. Component access, cargo-lane adjustability, payment interfaces, refrigeration layout, diagnostics, wiring organization, and parts support determine how much work a technician has to do after the machine enters service.
| Question | Why It Matters Later | What to Confirm |
|---|---|---|
| Can common service parts be reached without major disassembly? | Reduces time spent on routine diagnosis and replacement | Access to motors, sensors, payment devices, fans, controller, and refrigeration service areas |
| Can cargo lanes be adjusted? | Provides flexibility when merchandise changes | Lane width, shelf spacing, dispensing options, product limits |
| Is remote diagnostics available? | Can reduce unnecessary field visits | Fault history, device state, transaction data, inventory, and available temperature monitoring |
| Are payment interfaces documented? | Reduces problems during payment upgrades | Supported interface, power requirements, controller compatibility, selected terminal |
| Are replacement parts identifiable? | Prevents wrong-part orders | Part numbers, machine model, diagrams, supplier support |
| Is refrigeration matched to the merchandise? | Prevents chronic temperature and loading problems | Product requirement, cabinet configuration, airflow, control range |
| Is technical support available after delivery? | Helps technicians diagnose unfamiliar systems | Documentation, remote support, warranty process, replacement-part procedure |
Service access should be considered before the purchase order
Ask to see how the machine opens and how common parts are reached. A specification sheet can tell you screen size and capacity, but it may not show how long a technician needs to remove a motor, inspect a fan, reach a controller, or access the payment hardware.
A design that saves a few centimeters of internal space by burying service components can create unnecessary labor later.
Product flexibility should not come at the expense of reliability
Adjustable lanes are useful, but “adjustable” does not mean every product belongs in every mechanism. The most reliable configuration is still the one matched to the merchandise.
Zhongda Smart’s manufacturing process uses product information before final machine configuration, and real merchandise can be used for dispensing evaluation where package behavior is difficult to judge from dimensions alone. That approach is particularly useful for flexible packages, unusual shapes, fragile products, or mixed product sizes.
After-sales support should have a defined process
A support policy is more useful when it explains what happens after a fault is reported. Zhongda Smart’s current after-sales service policy lists a one-year warranty under the stated operating conditions, replacement spare parts for qualifying issues during the warranty period, and technical support procedures. The exact commercial contract and machine documentation should be checked for the equipment being purchased.
I’d recommend asking for the spare-parts process, technical contact path, machine documentation, and diagnostic information before deployment rather than waiting for the first failure.
Maintenance Records That Help the Next Technician
A useful maintenance record should make the next diagnosis faster. A long form filled with vague notes is less valuable than a short record containing the right details.
Record:
-
Machine identification and model
-
Date and time
-
Reported customer symptom
-
Relevant fault or error code
-
Selection or subsystem affected
-
Observed mechanical condition
-
Diagnostic steps performed
-
Adjustment made
-
Part number replaced, if any
-
Software or configuration change
-
Test used to confirm repair
-
Follow-up work required
Photographs are useful when the fault is physical. A picture of a worn belt, damaged harness, unusual condensation, changed card-reader installation, door misalignment, or recurring product jam can preserve information that is difficult to describe later.
Build a simple fault history
For each machine, keep enough history to answer four questions:
-
What fails most often?
-
How long does restoration usually take?
-
Does the same repair return?
-
Which parts or conditions are associated with the failure?
Once those answers are visible, maintenance intervals can be adjusted based on evidence instead of habit.
Printable Vending Machine Preventive Maintenance Checklist
This checklist is intended for a routine service visit. Add machine-specific items from the equipment manual where required.
Exterior and Safety
-
☐ Cabinet is stable and sitting correctly
-
☐ Door closes and locks normally
-
☐ Glass and exterior panels show no new damage
-
☐ Pickup door operates freely
-
☐ Visible power cord and plug show no damage
-
☐ No unusual heat, electrical odor, moisture, or discoloration is present
Cleaning
-
☐ Screen and customer-contact surfaces cleaned
-
☐ Pickup compartment cleaned
-
☐ Product debris removed from shelves and cabinet floor
-
☐ Sensors and product paths visually inspected
-
☐ Ventilation openings remain clear
Products and Dispensing
-
☐ Products loaded in correct orientation
-
☐ Packages are not compressed tightly inside lanes
-
☐ Lane dividers remain correctly positioned
-
☐ Spirals, belts, or pushers show no obvious obstruction
-
☐ High-use selections visually inspected
-
☐ Test vend completed successfully
-
☐ Vend detection confirmed where applicable
Payment
-
☐ Cashless reader matches approved physical installation
-
☐ Reader is secure and shows no sign of substitution or tampering
-
☐ Payment-device cabling appears intact
-
☐ Bill validator and coin mechanism show no obvious jam
-
☐ Payment transaction tested when required
Refrigeration
-
☐ Door gasket inspected
-
☐ Required airflow path is unobstructed
-
☐ Condenser area inspected for visible buildup
-
☐ Accessible fans sound and operate normally
-
☐ Temperature checked according to the operating procedure
-
☐ No unusual condensation or water is present
Connectivity and Controls
-
☐ Machine online status confirmed where applicable
-
☐ Active alarms reviewed
-
☐ Recent failed-vend events reviewed
-
☐ Door-mounted wiring shows no pinching or rubbing
-
☐ Screen, keypad, or selection interface responds normally
Closeout
-
☐ Repair or adjustment recorded
-
☐ Replacement part number recorded
-
☐ Functional test completed after repair
-
☐ Follow-up work scheduled if needed
-
☐ Machine returned to normal customer-ready condition
Building a Maintenance Program for a Fleet
A good maintenance system does not need to begin with complicated software. Start with equipment identification, a repeatable service checklist, consistent repair records, and a short list of performance measures.
Step 1: Build the asset record
Record every machine model, serial number, controller version, refrigeration configuration where applicable, payment devices, network hardware, product-lane map, and installed options. Photograph the machine and approved payment-terminal arrangement.
Step 2: Standardize the refill inspection
Give route staff a checklist short enough to complete on every visit. The routine should cover visible damage, product loading, cleanliness, payment condition, pickup area, active errors, and a functional vend check where required.
Step 3: Separate route work from technical work
Route staff should not be expected to perform work that requires electrical, refrigeration, security, or advanced diagnostic training. Define what they can inspect, what they can adjust, and what should be escalated.
Step 4: Create a verified spare-parts list
Start with the failures that actually occur. Record the exact part number and compatible model before adding an item to stock. One verified spare motor is more useful than several unknown motors that happen to look similar.
Step 5: Review repeat problems every month
Look for the selections, machines, payment devices, and refrigeration systems that generate recurring work. A maintenance program should become more specific over time as the fault history grows.
Step 6: Change the schedule when the evidence changes
If one fan repeatedly collects dust before the planned cleaning date, inspect it sooner. If a particular belt remains in stable condition for long periods, avoid replacing it without evidence or a manufacturer requirement. The maintenance schedule should develop around real equipment behavior.
Frequently Asked Questions
How often should a vending machine be serviced?
A basic condition check should be included in every refill or route visit. More detailed mechanical, payment, electrical, and refrigeration inspections can be planned monthly, quarterly, semiannually, or annually depending on the machine, usage, fault history, and manufacturer’s instructions. High-use or demanding installations may need shorter intervals.
Why does a vending machine take payment but not dispense the product?
First check whether the selected lane received a command and whether the dispensing mechanism actually moved. Then inspect product fit, loading orientation, spiral or belt position, lane obstruction, motor connection, and vend sensing. A failed delivery does not automatically mean the motor needs replacement.
Why does the same vending slot keep jamming?
Compare the product with the lane setup. Check package width, stiffness, loading pressure, orientation, divider position, spiral size or belt path, and clearance from neighboring products. If the lane jams only with one product, the package and dispensing configuration should be investigated before replacing electrical parts.
How often should a refrigerated vending machine condenser be cleaned?
Follow the equipment manufacturer’s service instructions and inspect the condenser area regularly. The actual cleaning frequency depends on how quickly dust and debris accumulate. If visible buildup is already restricting airflow, clean the area using the approved procedure rather than waiting for a fixed calendar date.
What should I do if the vending machine card reader goes offline?
Check terminal power, machine connectivity, physical cabling, controller communication, network status, and any available error logs before replacing the reader. Determine whether the failure affects only the terminal or the entire machine. If the device shows signs of tampering or unauthorized substitution, stop normal payment use and follow the payment provider’s security procedure.
Which spare parts should a vending operator keep?
Keep parts that match the installed fleet and can resolve common downtime. Depending on the equipment, useful stock may include dispensing motors, lane hardware, sensors, fans, door gaskets, locks, approved cables, and specified protective components. Record exact part numbers and machine compatibility.
Can preventive vending machine maintenance reduce operating costs?
Preventive work can reduce avoidable emergency visits, repeat service, extended downtime, product loss, and secondary damage. The financial benefit depends on the machine. Compare actual planned-maintenance costs with repair history, technician travel, part costs, outage duration, and gross margin rather than assuming a fixed return.
When should a vending machine be replaced instead of repaired?
Consider replacement when several systems fail repeatedly, critical parts become difficult to obtain, structural condition deteriorates, refrigeration reliability cannot be restored economically, required upgrades become excessive, or recurring downtime costs more than the machine can justify. Use actual service and operating records rather than machine age alone.
About This Guide
This guide is published by Zhongda Smart from a vending-machine manufacturing, configuration, testing, and after-sales perspective. Zhongda Smart develops configurable vending equipment with dispensing systems, refrigeration options, payment integration, connectivity, remote-management functions, and OEM/ODM machine configurations.
Zhongda Smart’s current public factory information describes approximately 20,000 square meters of working space, more than 400 employees, an engineering team of more than 10 people, three assembly lines, more than 20 quality inspectors, four sheet-metal processing workshops, a painting line, and annual production capacity of 10,000 units. The manufacturing workflow includes specification confirmation, mechanical production, assembly, software and payment integration, product testing, production quality control, aging testing, and final acceptance.
Machine-specific service manuals, component instructions, product-storage requirements, and qualified technical procedures take priority whenever they specify a different maintenance method.
Sources and Technical References
-
ENERGY STAR — Vending Machines. ENERGY STAR states that certified refrigerated beverage vending machines are on average 9% more energy efficient than standard models and save about 1,000 kWh annually. View ENERGY STAR vending machine guidance.
-
PCI Security Standards Council — Point-of-Interaction Device Security. Guidance covers maintaining a device inventory, periodically inspecting point-of-interaction equipment for tampering and unauthorized substitution, and training personnel to recognize suspicious device changes. View PCI SSC guidance.
-
NAMA — Multi-Drop Bus / Internal Communication Protocol. NAMA’s current vending technology resources provide MDB/ICP Version 4.3 for vending-machine controller and peripheral communication. View NAMA technology resources.
-
ISO 5149-4:2022 — Refrigerating systems and heat pumps: Operation, maintenance, repair and recovery. The standard addresses safety and environmental requirements related to operation, maintenance, repair, and refrigerant recovery. View ISO 5149-4:2022.
-
Zhongda Smart — How We Manufacture Vending Machines: Inside Zhongda Smart Factory. Factory information and manufacturing workflow used for the manufacturing, testing, configuration, and serviceability information described in this guide. View Zhongda Smart manufacturing process.
Disclaimer
This article provides general vending machine maintenance and operating information. It does not replace the service manual, electrical documentation, payment-provider instructions, refrigeration requirements, product-storage instructions, or safety procedures for a specific machine. Maintenance intervals shown here are practical planning baselines rather than guaranteed service intervals.
Disconnect and secure equipment as required before servicing. Electrical repair, sealed refrigeration work, payment-security incidents, and other specialized procedures should be handled only by appropriately qualified or authorized personnel. Do not bypass safety devices, install replacement components with unverified specifications, modify payment-security controls, or handle refrigerant without the required qualifications and equipment.